Cultivating Creeping Companions: Best Practices for Rooting Ivy Cuttings
Ivy, with its cascading tendrils and air-purifying properties, remains a popular choice for indoor greenery. For those who wish to expand their collection or share the beauty of this versatile vine, propagation offers a rewarding solution. There are several methods for propagating ivy, but the question often arises – what is the best way to root ivy cuttings? The answer, like the growth of the ivy itself, unfolds with a balance of understanding the available methods and considering your personal preferences.
A Tale of Two Environments: Soil versus Water Propagation
Two primary methods dominate the realm of ivy cutting propagation: rooting in soil and rooting in water. Each approach offers distinct advantages and disadvantages, making the optimal choice dependent on your specific needs and experience level.
-
Soil Rooting: This traditional method involves planting the ivy cutting directly into a pot filled with a well-draining potting mix. Soil rooting offers the benefit of establishing the cutting in its permanent growing environment from the outset. However, it can be slower than water rooting and requires more attention to maintain consistent moisture levels in the potting mix.
-
Water Rooting: This visually appealing method involves placing the ivy cutting in a container filled with water. Water rooting allows for easy observation of root development and is generally faster than soil rooting. However, water-rooted cuttings require an additional step of transitioning them to soil once roots have developed.
Soil Rooting: A Foundation for Growth
If you choose the soil rooting method, follow these steps for success:
-
Prepare the Potting Mix: Fill a pot with drainage holes with a well-draining potting mix specifically formulated for houseplants. A light and airy mix with ingredients like perlite or coco coir is ideal for promoting root development.
-
Planting the Cutting: Select a healthy ivy stem with at least 2-3 nodes (leaf bumps). Using sharp pruning shears, make a clean cut at a 45-degree angle just below a node. Dip the cut end of the stem in rooting hormone (optional) to encourage root growth. Create a hole in the potting mix and plant the cutting, ensuring at least one node is buried.
-
Aftercare: Water the newly planted cutting thoroughly until water drains from the pot’s drainage holes. Place the pot in a location with bright, indirect sunlight. Maintain consistent moisture in the potting mix, but avoid overwatering. Misting the leaves occasionally can be beneficial, especially in dry environments.
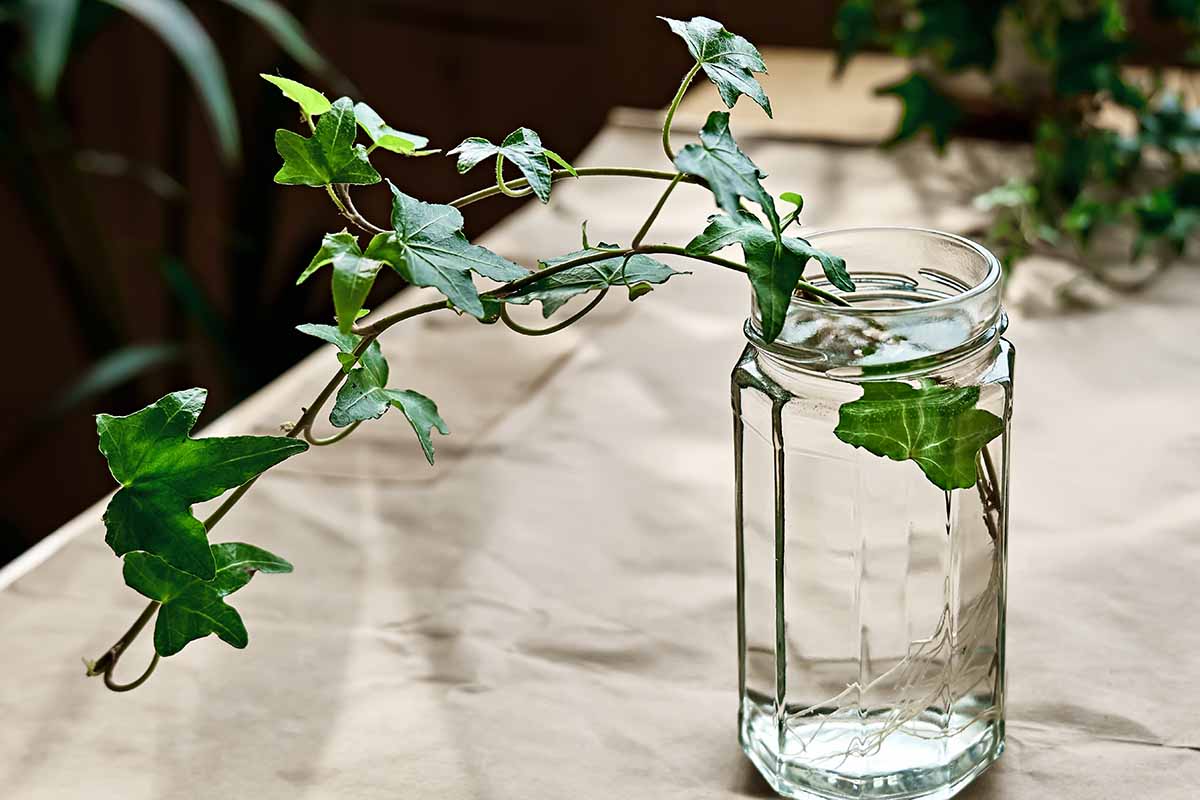
Water Rooting: A Transparent Journey
For those seeking a more visual propagation experience, water rooting is an excellent choice. Here’s how to achieve success:
-
Container Selection: Choose a clear glass jar or vase to allow you to monitor root development. Ensure the container is disinfected before use.
-
Preparing the Cutting: Similar to soil rooting, select a healthy ivy stem with at least 2-3 nodes. Make a clean cut at a 45-degree angle just below a node. Remove any lower leaves that would be submerged in the water.
-
Water and Aftercare: Fill the container with clean, room-temperature water, ensuring only the lower 1-2 inches of the stem are submerged. Place the container in a location with bright, indirect sunlight. Change the water every 3-4 days to maintain fresh oxygen levels and prevent bacterial build-up. Within a few weeks, you should begin to observe small, white roots emerging from the submerged nodes.
-
Transitioning to Soil: Once the roots have reached a length of 1-2 inches, your ivy cutting is ready to be transplanted into soil. Fill a pot with drainage holes with a well-draining potting mix. Gently remove the cutting from the water and carefully examine the roots. If any appear brown or mushy, prune them off with clean shears. Plant the cutting in the pot, ensuring the roots are spread out and the plant sits upright. Water thoroughly until water drains from the pot’s drainage holes. Continue to care for your newly potted ivy plant by maintaining consistent moisture and providing bright, indirect sunlight.
-
The Final Verdict: Choosing the Right Method for You
So, which method reigns supreme – soil or water rooting? The truth is, there’s no single “best” way. The optimal choice depends on your individual circumstances:
-
Experience Level: For beginners, water rooting might be a slightly more forgiving approach due to the ease of monitoring root development. However, experienced plant enthusiasts may find soil rooting to be a more streamlined process.
-
Desired Timeline: If speed is a priority, water rooting generally yields faster results in terms of initial root development. However, the additional step of transitioning to soil adds time to the overall process.
-
Personal Preference: Some individuals simply prefer the visual appeal of watching roots grow in water. Others may favor the efficiency of planting directly in soil. Ultimately, the best method is the one that you find most enjoyable and practical.
Beyond the Basics: Optimizing Rooting Success
Regardless of the rooting method you choose, a few additional tips can enhance your success rate:
-
Healthy Source Material: Always select healthy ivy cuttings from a mature plant with actively growing foliage. Weak or diseased cuttings are less likely to root successfully.
-
Light and Temperature: Maintain consistent conditions. Both soil and water rooting methods benefit from bright, indirect sunlight and warm temperatures between 65°F and 75°F (18°C – 24°C).
-
Patience is Key: Rooting takes time. Avoid constantly checking on your cuttings or disturbing the roots during the process. Be patient and allow nature to take its course.
Conclusion
With a little understanding and these helpful techniques, you can successfully root ivy cuttings, whether in soil or water. Each method offers unique benefits and caters to different preferences. So, grab your pruning shears, choose your preferred method, and embark on the rewarding journey of cultivating new ivy companions for your indoor jungle.
-